| quad VCO |
| dual VC ADDSR |
| dual VCF |
| dual VCA |
| modulator |
| divider |
| mixer |
| sequencer |
| S&H |
| power supply |
| keyboard |
| MIDI2CV |
| SOUNDS |

|
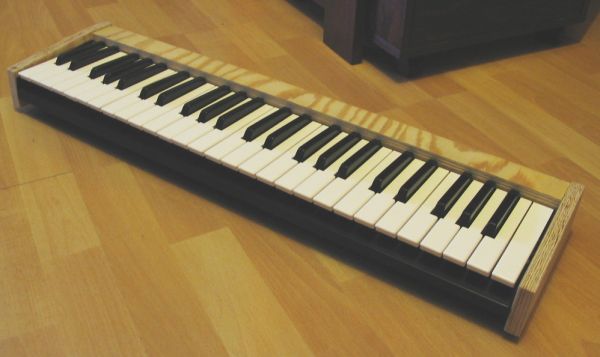
Enough playing with knobs ;) time for a keyboard. I bought cheap broken Casio CA100 toy and cut the keyboard out of it. Then I added sides and top made of 15mm plywood. Next step was to install MIDI circuitry. I used one of my early prototypes of the boards available here. I planned to add DAC output, but it ended up as plain MIDI keyboard. It doesn't even have any user settings, like channel, or transposition, it's just keys...
Parameters
- MIDI functionality: note on/off, constant velocity
- powered by 4 almost dead AA batteries
- highly sophisticated, metal lever toggle switch, for changing modes of operation: on and off.

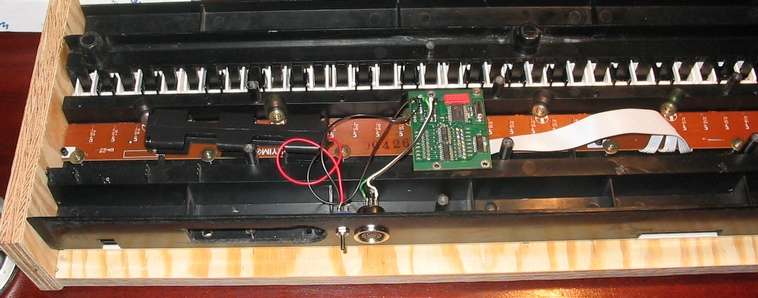
Below you can see how the keyboard scanner is mounted. Powered by 4 AA batteries old enough to provide no more than 5V (no regulator at the board). Although PCB is kept in place by one screw, it's enough for this little board. The battery pack holds in place by means of sponge force. In the picture the bottom cover is removed so you can't se the actual sponge. The only controller is the power switch next to MIDI OUT socket. I often forget to turn it off, but the current drain is so small it doesn't hurt the batteries even if it's on for couple of days. My son often uses it as practice keyboard, when making tunes with MIDI sound module.

The good thing about this keyboard is that it's extremely light. You can grab it one hand and throw up high in the air. Of course you have to catch it then, after all it's cheap Casio plastic inside. But the most fun part was when I finally could plug it into my new MIDI2CV module. Yeah! After all these years I finally was able to make this very simple circuit (I'm writing this in July 2008). It was so fun that I even cosider going back to modular synths and make more modules, and who knows, maybe I'll start reading Sunth-DIY list emails again...
To read about the MIDICV module, click here